


[팁] 응용문제
136.♡.179.124
hongjuny
2005.12.20 01:19
2,069
1
0
0
-
- 첨부파일 : Cycloid.png (102.3K) - 다운로드
본문

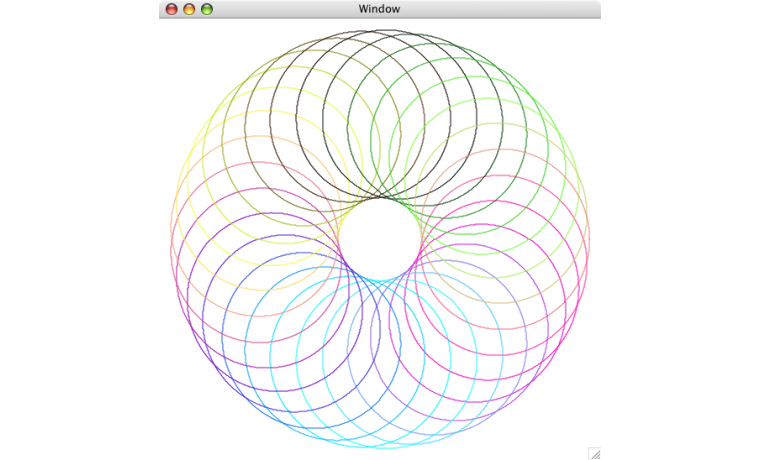
예전에 대입 학력고사에 본고사가 있던 시절, 서울대 본고사 문제에 나왔다는 전설의 그 문제! 사이클로이드라는 것이 있습니다. 이 예제는 사이클로이드와 똑같지는 않지만 대략 비슷한 원리입니다. 자전거 바퀴살에 불을 하나 달고 밤에 타고 간다면 그 불빛은 원을 그리며 앞으로 전진을 하겠지요? 그런데 그 불빛이 반드시 원은 아니고, 마치 어린 아이들이 낙서할 때 동그라미를 그리는, 중고딩 시절에 볼펜 스프링 주욱 잡아늘였을 때 보이는 그런 모양이 보이게 됩니다.
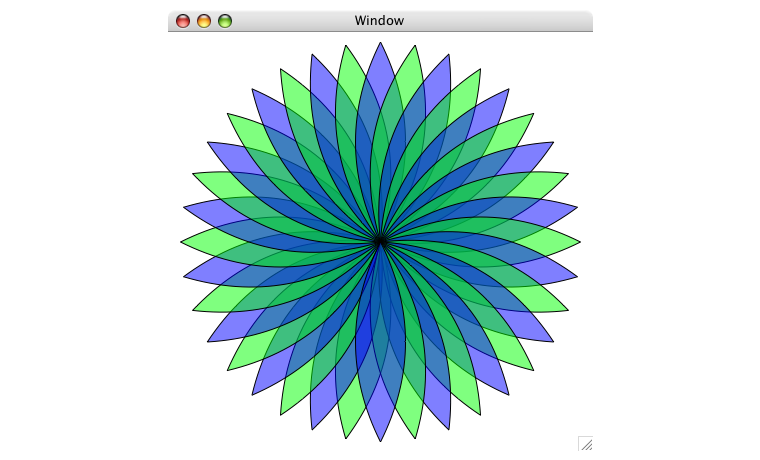
바로 그것을 그린 예제입니다. 그냥 그림만 그리면 재미없으므로 색상도 바꾸어 봅니다. 색상도 똑같이 바꾸면 재미 없으므로 RGB 각각 30도씩 위상차를 두어 바뀝니다. 그 결과 이렇게 재미있는 그림이 되었습니다.
Quartz 2D 의 색상을 바꾸는 방법, 선분을 그리는 방법 등등을 볼 수 있는 예제가 되겠습니다. ^^
OSStatus MyDraw( EventRef event, WindowRef window )
{
OSStatus status = noErr ;
CGContextRef myContext ;
HIRect bounds ;
double i ;
double rv, gv, bv ;
int px, py, ox, oy, innerrad = 100, outerrad = 150 ;
status = GetEventParameter( event,
kEventParamCGContextRef,
typeCGContextRef,
NULL,
sizeof( CGContextRef ),
NULL,
&myContext ) ;
require_noerr( status, CantGetGraphicsContext ) ;
HIViewGetBounds( (HIViewRef) window, &bounds ) ;
require_noerr( status, CantGetBoundingRectangle ) ;
/////
CGContextTranslateCTM( myContext, bounds.size.width / 2, bounds.size.height / 2 ) ;
for( i = 0.0 ; i < 360.0 ; i+=0.01 ) {
CGContextBeginPath( myContext ) ;
rv = sin( ( i + 30.0 ) * 2 * M_PI / 180. ) / 2 + 0.5 ;
gv = sin( ( i + 60.0 ) * 3 * M_PI / 180. ) / 2 + 0.5 ;
bv = sin( i * M_PI / 180. ) / 2 + 0.5 ;
CGContextSetRGBStrokeColor( myContext, rv, gv, bv, 1.0 ) ;
px = (int)( cos( i * M_PI / 180. ) * (double)outerrad +
cos( i * 30.0 * M_PI / 180. ) * (double)innerrad ) ;
py = (int)( sin( i * M_PI / 180. ) * (double)outerrad +
sin( i * 30.0 * M_PI / 180. ) * (double)innerrad ) ;
if( i == 0.0 ) {
ox = px ;
oy = py ;
} else {
CGContextMoveToPoint( myContext, ox, oy ) ;
CGContextAddLineToPoint( myContext, px, py ) ;
ox = px ;
oy = py ;
}
CGContextStrokePath( myContext ) ;
}
CantGetGraphicsContext:
CantGetBoundingRectangle:
return status ;
}
0
0
로그인 후 추천 또는 비추천하실 수 있습니다.
최신글이 없습니다.
최신글이 없습니다.


댓글목록 1
악동시니님의 댓글
- 악동시니님의 홈
- 전체게시물
- 아이디로 검색
58.♡.48.1 2005.12.21 00:41잘되는데요